|
|
| (28 intermediate revisions by 2 users not shown) |
| Line 1: |
Line 1: |
| [[File:m100-dvi-2.jpg]] | | [[File:m100-dvi-2.jpg]] |
| [[File:m100-dvi-1.jpg]] | | [[File:m100-dvi-1.jpg]] |
| ==Manuals==
| |
| [http://www.classiccmp.org/cini/pdf/Tandy/Disk%20Video%20Interface%20Manual.pdf Manual]
| |
|
| |
|
| [http://www.classiccmp.org/cini/pdf/Tandy/Disk%20Video%20Interface%20Service%20Manual.pdf Service Manual] | | ==Video== |
| | [https://youtu.be/Mt6AmyLKkXQ Basic Usage Example] |
|
| |
|
| ==Boot Disk== | | ==Manuals== |
| [http://www.club100.org/memfiles/index.php?&direction=0&order=&directory=Steve%20Adolph/DVI%20boot%20disk%20files Boot Disk files from Steven Adolf on Club100] | | <!-- [http://cini.classiccmp.org/pdf/Tandy/Disk%20Video%20Interface%20Manual.pdf Manual] --> |
| | [https://archive.org/details/trs-80-model-100-disk-video-interface Manual] |
|
| |
|
| ==Cable==
| | [http://cini.classiccmp.org/pdf/Tandy/Disk%20Video%20Interface%20Service%20Manual.pdf Service Manual] |
| ===For Model 100===
| |
| Parts:
| |
| *40pin DIP idc connector
| |
| :http://www.king-cart.com/phoenixent/product_name=HWS15322
| |
| *40pin female idc connector, with polarity notch and strain-relief
| |
| :http://www.king-cart.com/phoenixent/product_name=HWS1877
| |
| *40pin ribbon cable, 20 inches
| |
| :http://www.king-cart.com/phoenixent/product_name=HWS16014
| |
|
| |
|
| Assembly:
| | [https://archive.org/details/DVI263806Notice 26-3806 Notice] |
| *Crimp the cable in the DIP connector such that if you are looking at the dip connector with the #1 pin top-left and pins pointing away from you, the cable exits to the right, red stripe on top.
| |
| *For the DVI end of the cable...
| |
| **This assumes you ordered the actual DIP connector linked above, or have another one that connects it's pins to the conductors in the same pattern. Not all do. See note below.
| |
| **Grab the red wire and the one next to it as a single pair, and peel the pair away from the rest of the cable for about 2 to 3 inches. Repeat for the rest of wires, so the cable ends in 20 loose pairs.
| |
| **Take a sacrificial IDC connector, with strain relief clip, all snapped together but with no cable, so that the connector makes a thin open slot that's the perfect size for a cable to fit in. This will be used as a wire guide to hold all the loose pairs into their original flat ribbon cable shape so that you can crimp them all in a connector.
| |
| **Take the 1st pair of wires with the red wire, twist the pair 1/2 way, and insert it into the empty slot, right against one end of the slot, so that there is a grey wire at the edge of the slot, and the red wire is one position in from the end of the slot. Repeat the twist & insert for all the remaining pairs, until the whole cable is in the slot, but with every pair twisted.
| |
| **Crimp a new female IDC connector on the end of the cable. Make sure the triangle marker for pin-1 is on the red-stripe side of the cable. Wiggle the bundle of cables around a little to settle all those loose pairs into their proper positions before really crimping. It doesn't matter much which way the polarty notch points. There is room for the cable to fold back over the connector under the DVI if it needs to. What matters is that the pin-1 marker is on the same side of the cable as the red wire.
| |
|
| |
|
| [[File:m100_dvi_cable_1.jpg|200px]] | | [https://archive.org/details/TRS80DVICorrectionBASICErrorCodes Correction to BASIC Error Codes] |
| [[File:m100_dvi_cable_5.jpg|200px]]
| |
| [[File:m100_dvi_cable_3.jpg|200px]]
| |
| [[File:m100_dvi_cable_4.jpg|200px]]
| |
| [[File:m100_dvi_cable_pinout.png|200px]]
| |
| [[File:m100_dvi_cable_2.jpg|200px]]
| |
|
| |
|
| [https://photos.app.goo.gl/DP01aAsCh7OgFULV2 More Pictures] | | ==Other Books== |
| | [https://archive.org/details/InsideTheTrs80Model100 Inside The TRS-80 Model 100] |
|
| |
|
| ====NOTES==== | | ==System Disk== |
| *This pinout flatly violates the pinout written in the Service Manual for the DVI! Never the less, this is the way it actually needs to be wired.
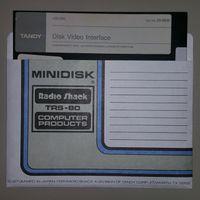
| | There are 2 versions of the system disk, one for Model 100 (and 102) only, and one for both Model 100 & 200. |
|
| |
|
| *Some DIP IDC connectors connect pin 1 to conductor 1, and pin 40 to conductor 2
| | [[File:DVI_system_disk_1.jpg|200px]] |
| :While some others connect pin 1 to conductor 2, and pin 40 to conductor 1. | | [[File:DVI_system_disk_2.jpg|200px]] |
|
| |
|
| :So, you may possibly NOT need to seperate & twist all those wires, depending on which type of DIP connector you happen to have. | | Steven Adolph has dissected and copied the system disk files.<br> |
| | [http://www.club100.org/memfiles/index.php?&direction=0&order=&directory=Steve%20Adolph/DVI%20boot%20disk%20files System Disk files from Steven Adolf on Club100] |
|
| |
|
| :The DIP IDC connector linked above connects pin 1 to conductor 2, and DOES need to have the conductors split into pairs and twisted.
| | The system disk formatting and files are fully described in the service manual. |
|
| |
|
| *More sources for crimp-on dip40 plugs
| | Arcadeshopper has copies of both versions of the system disk. |
| :http://ebay.com/itm/182240437070
| |
|
| |
|
| ===For Model 102 and 200===
| | [https://www.arcadeshopper.com/wp/?page_id=11#!/Disk-Video-Interface-system-disk-26-314-Model-100-102/p/141587103/category=28313042 26-314 for Model 100] |
| Parts:
| |
| *40pin male idc connector, with polarity notch
| |
| :http://www.king-cart.com/phoenixent/product_name=HWS15924
| |
|
| |
|
| *40pin female idc connector, with polarity notch and strain-relief
| | [https://www.arcadeshopper.com/wp/?page_id=11#!/Disk-Video-Interface-system-disk-26-3806-Model-200/p/143281618/category=28313042 26-3806 for Model 200] |
| :http://www.king-cart.com/phoenixent/product_name=HWS1877
| |
|
| |
|
| *40pin ribbon cable, 20 inches
| | ==Cable== |
| :http://www.king-cart.com/phoenixent/product_name=HWS16014 | | [[Disk/Video Interface: Cable|Cable]] |
|
| |
|
| Assembly:
| | ==Drives== |
| *Crimp the male connector on one end of the cable. Make sure the red wire goes on the Pin-1 marker on the connector, and ideally put the polarity notch at the end of the cable.
| | [[Disk/Video Interface: Drives|Drives]] |
| *On the other end of the cable, same as for the DVI-end above for Model 100.
| |
|
| |
|
| (Pics show the twists on the T102 end instead of the DVI end, but it actually doesn't make a difference where you put the twists.)
| | ==ROM dumps== |
| | [[File:M40_P.bin]] is the main rom<br> |
| | [[File:M17 CG.bin]] is the character generator<br> |
| | https://drive.google.com/drive/folders/1yqVh_mj5vtBJhYng-Uitvsjnykq0Knnt |
|
| |
|
| [[File:t102-dvi-1.jpg|200px]]
| | ==Wonderful Hacks from Days Gone By== |
| [[File:t102-dvi-2.jpg|200px]] | | [https://raw.githubusercontent.com/LivingM100SIG/Living_M100SIG/main/M100SIG/Lib-09-PERIFERALS/DVI2ND.INF Use the cassette motor control to use both sides of a double-sided drive!] |
| [[File:t102-dvi-3.jpg|200px]]
| |
| [[File:t102-dvi-4.jpg|200px]]
| |
| [[File:t102-200-dvi-pinouts.png|200px]]
| |
|
| |
|
| [https://photos.app.goo.gl/rJI6McVf9jRmI7Is2 More Pictures]
| | ==Search the entire M100SIG archive for anything related to the Disk/Video Interface== |
| | | https://github.com/LivingM100SIG/Living_M100SIG/search?q=Disk%2FVideo |
| ===Quick-n-Dirty neat trick=== | |
| Another much easier way to get the wires crossed the right way, is just join 2 ordinary female idc connectors with a straight through double ended male-male idc pin header. The arrangement of the female connectors must matter, and I assume that the rule is just match up the red stripe from both cables. Thanks Mike Stein for this trick.
| |
| | |
| [[File:flip-pairs-idc-cable-trick.jpg|200px]]
| |
| | |
| ==Wonderful Hacks from Days Gone By==
| |
| [ftp://salsa.net/pub/M100SIG/Lib-09-PERIFERALS/DVI2ND.INF Use the cassette motor control to use both sides of a double-sided drive!]
| |


